Showing posts with label Decorations. Show all posts

1.15.2014

Christmas Decorating - Part 2

Now that its ohhhh....January 15th, I thought it was time to wrap up the rest of our Christmas decor that we got to enjoy for over a month...which is totally not enough time.  If it were up to me, I'd keep everything up all year long.  How cheerful would that be?!  Mighty.  

But now that all of this has been taken down, it's been nice to go back over these pictures to remember all the joy these decorations brought our home.  Gosh, I love Christmas and everything about it.  Missing the holidays already.  
Simple but perfect for us.
 What we got to enjoy at night with all the lights off.
xo

12.22.2011

Dining Room Christmas Decor

Keeping with our theme I decided to pull out all things red and white striped, balls and glittery (wrapping paper).  The best part, I had almost everything (except for some balls) already in my Christmas bins.  You can see our entry here and mantle here.

Searching pinterest one day, I found this cute little tree made of twine.  My favorite item for all things household.  I couldn't pass up not making this easy tree.  

I took brown scrap book paper (you can use any color you want, but brown is what I had on hand), twine and hot glue.  That's it.  3 simple things that most of you already have.  I shaped the paper into a cone and began wrapping the cone, hot gluing along the way. 
Here she is.  I adore her.
On to the dining room.  
I used some leftover red and white striped fabric from B's birthday party and laid it on top of the burlap (just like I did in our entry).  
These are the bowls I got from Wal-Mart last year after Christmas for a buck each!  So I got 10.  5 square and 5 round.  I used red fabric (also left over from B's party), cut them in squares and folded them in thirds and loosely tied twine around them. 
There's my twine tree.  Isn't she lovely?  Oh and I love that song.  :)  
The basket of balls with pinecones at the bottom as a "filler."  


I got the white bowl from a thrift store about a year ago and adore it.  It seems to go well with everything.  The little glass jar I filled with red and silver berry twigs (which used to go on our tree as decorations) is wrapped with blue glittery wrapping paper to match the blue glittery balls.  Then I half-way filled the mason jars with "snow" and threw in some candles.  And yes, I will be lighting those babies.  :)
I'm uber proud of myself for not having to buy hardly anything at all to decorate with this year.  I bought, balls, a bag of snow, small candles and tile.  
Tile as in real tile that you hang on your kitchen walls.  It's true.  Do you see the white tiles in next to the plates and chargers?  I got those from Home Depot as my coasters.  I got 10 tiles and some felt sticky tabs.  Each tile was 16 cents and the tabs were around $3.  I needed some coasters but wanted something very very simple, white and chic.  So this is what I came up with.
 Within 5 minutes I had all 10 tiles tabbed up on all four corners.
To stay married (since our dining room table is my husband's 3rd love behind me and Boston, of course :)) and to keep our table scratch-free, these felt pads were a must.

Here they are sittin' pretty on our shiny-scratch-free-table!  Who knows, next year they may get a make-over.....or they may just stay white.  :)

Happy Thursday before Christmas (3 days away)!
~Jeni


12.21.2011

Christmas Mantle and Balls


We went very simple this year.  Typically, I throw lighted garland, balls and pine cones up on the mantle.  Uh huh, they get slung up there....where they land is where they stay.  Not this year.  Simplicity (less work) was my goal. :)

This year we went with balls, balls and more balls.  I like balls.  :)  Especially the colored and glittery ones.  Okay, that sounded weird.  :)  If you noticed, we put a lot of balls on our entry table.  And you'll see at the end of this week our dining room table that has tons of balls, too.  Me likey balls.  Oh wait, I already said that.

Anyway, here's what we did.  I got two (already owned) glass vases and filled those babies with....you guessed it, balls!  Then, keeping with my twine theme I wrapped those vases with twine and tied a bow.  That was it.  Took me less than 3 minutes.  That's my kinda decorating.  And they even look cute.

See the stocking hooks/picture holders?  Yeah, those still have a picture of the little girl that was already in them.  Haven't had time to change out the picture.  Oops.  She might just stay in the frame to celebrate Christmas with us.
Boston's H-U-G-E stocking that I got last year for 10 buckaroos from Pottery Barn after Christmas.  Ask me if I got two for a future baby.....why yes I did!
These aren't my favorite stockings but they work.  :)
Here's our balls close up.
Don't you just love those colors together?  I certainly do.
I really like having one small vase and one large vase.  Asymmetry can be a good thing.

Happy Mantle Decorating!
~Jeni

12.20.2011

Entry Christmas Decor

Our theme/colors this year are blue, silver, red and white stripes and burlap.  I love all of these colors together.  To me, it spells chic and fun.  

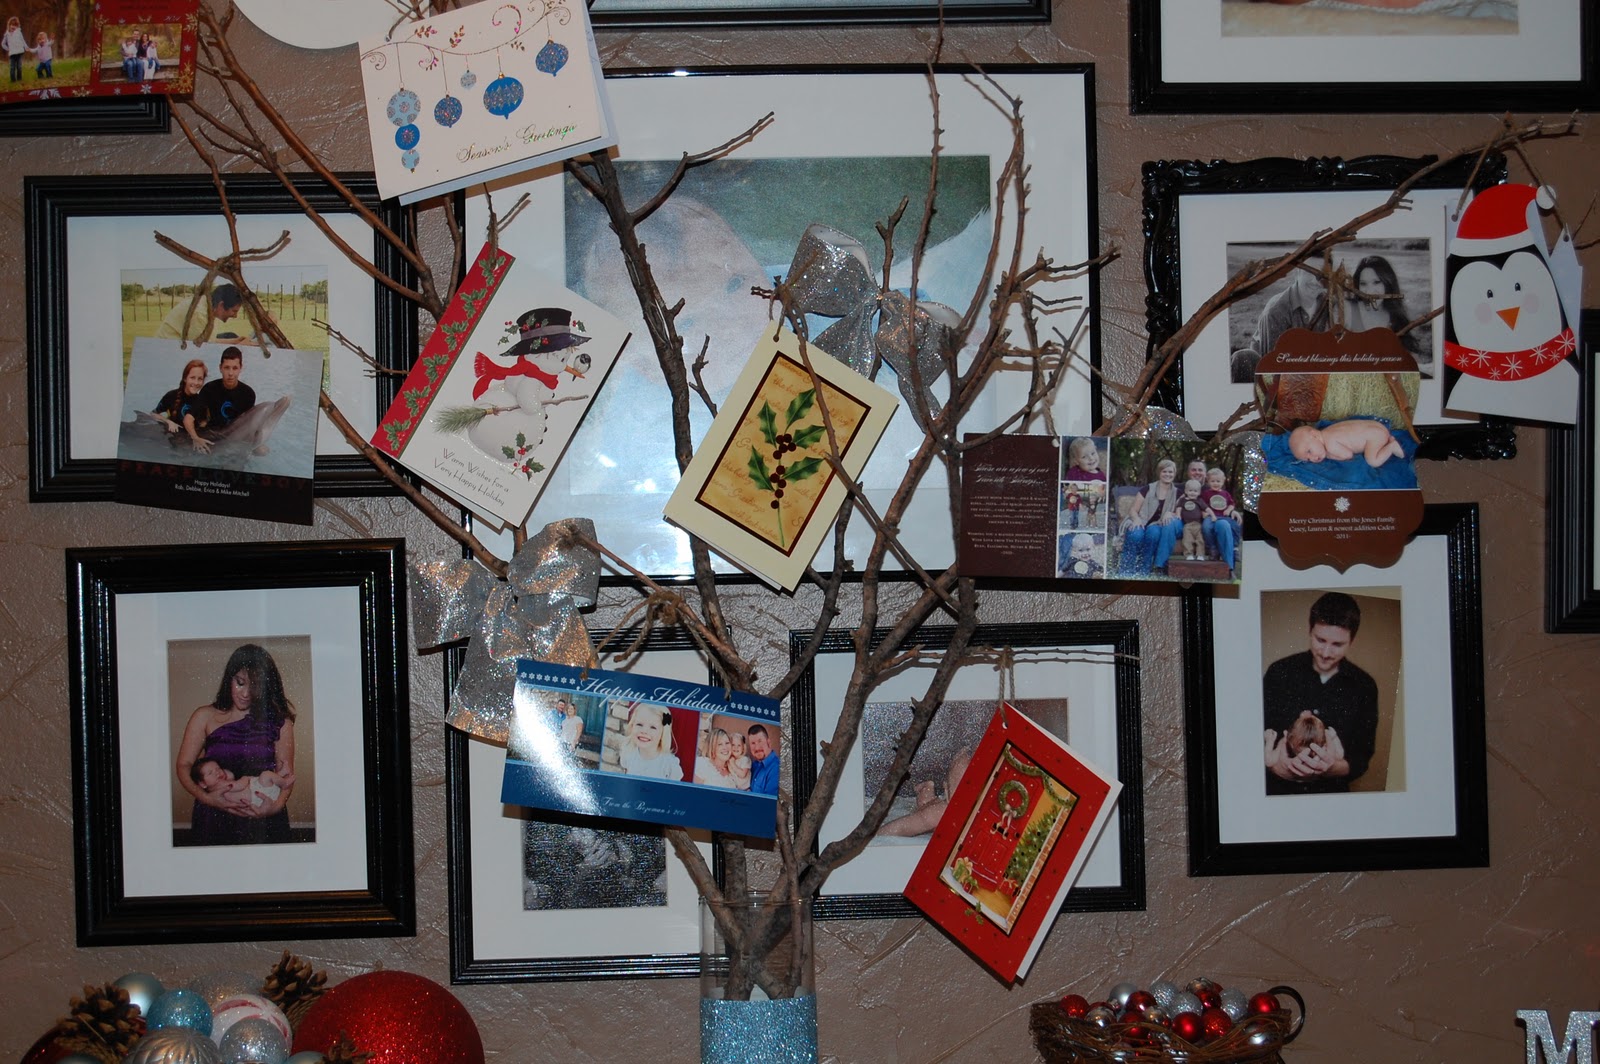
I decided that we needed a different way of presenting our Christmas cards when we get them.  The easiest way to me (and cute way) was to make a tree for them to hang on.  I went behind our fence in our backyard and chose a few small branches that looked good enough (sturdy enough) for what I would use them for.  I already had a cylindrical vase and popped those babies in the vase.  Then, so that you wouldn't be able to see them inside the vase, I wrapped the vase with blue sparkly wrapping paper that I'm also using to wrap our gifts in from Wal-Mart.  Simple, cheap and sparkly (which is my favorite part).  I absolutely love that wrapping paper!
What I love the most is everything was F.R.E.E.  I used everything I already had in my Christmas bins.  I didn't have to buy a.single.thang.  Winning!  
As for the runner, I cut burlap and ran it along the buffet table (which Jer calls our entry way dresser :)).  Then, I re-used the red and white stripes from Boston's birthday party and placed it on top of the burlap runner.  Again, simple and free.  Booyah.
I almost spray painted the tree branches white but decided that their natural brown colors looked great.  Maybe next year you'll see them painted a different color.  To add the cards, I used a hole puncher and hold punched the cards and ran twine through the holes and placed them on a branch (this picture was taken a few weeks ago so it doesn't show all of our cute cute Christmas cards we've gotten since then.   So if your card isn't in the picture, trust me, it's up there for all to see).  :)
Happy Entry Way Christmas Decorating,
~Jeni
Related Posts Plugin for WordPress, Blogger...